

Installing a new vanity and sink can transform your bathroom’s look and functionality. This guide will walk you through the process, helping you tackle this home improvement project with confidence.
Key Takeaways:
- Measure your space carefully before purchasing a new vanity
- Turn off water supply and disconnect plumbing before removal
- Ensure proper leveling and secure attachment to the wall
- Install the faucet before placing the vanity
- Double-check all connections to prevent leaks
- Consider hiring a professional for complex installations

Getting Started: Preparation and Planning
Before you begin the vanity and sink installation process, it’s important to properly prepare and plan. This will help ensure a smooth and successful project.
Assessing Your Space
The first step in installing a new vanity and sink is to carefully assess your bathroom space. Measure the area where the new vanity will go, taking into account any obstacles like doors, windows, or fixtures. It’s crucial to get accurate measurements to ensure your new vanity will fit properly.
Choosing the Right Vanity and Sink
Once you have your measurements, it’s time to select a vanity and sink that fits your space and style. Consider factors like storage needs, sink type (undermount, vessel, or integrated), and overall design aesthetic. Make sure to choose a vanity that’s not only visually appealing but also functional for your daily needs.
Gathering Tools and Materials
Before you start the installation, gather all the necessary tools and materials. This typically includes:
- Screwdriver
- Wrench
- Level
- Caulk gun
- Silicone caulk
- Plumber’s tape
- Adjustable pliers
- Drill and drill bits
- Stud finder
- Safety glasses and gloves
Having everything on hand before you begin will save time and prevent frustration during the installation process.
Removing the Old Vanity and Sink
The next step in the process is to remove the existing vanity and sink. This can be a bit messy, so be prepared with drop cloths and cleaning supplies.
Shutting Off the Water Supply
Before you do anything else, locate the water shut-off valves under the sink and turn them off. If there are no individual shut-off valves, you may need to turn off the main water supply to your home.
Disconnecting the Plumbing
Once the water is off, disconnect the supply lines from the faucet. You’ll also need to disconnect the P-trap from the drain. Have a bucket handy to catch any water that may still be in the pipes.
Removing the Old Vanity
With the plumbing disconnected, you can now remove the old vanity. Start by removing any caulk around the edges of the vanity top. Then, look for screws securing the vanity to the wall and remove them. You should now be able to pull the vanity away from the wall.
Installing the New Vanity
With the old vanity removed, you’re ready to install the new one. This process requires attention to detail to ensure everything is level and secure.
Preparing the Wall
Before installing the new vanity, check the wall for any damage and repair if necessary. This is also a good time to paint or update the wall if desired.
Positioning and Leveling the Vanity
Place the new vanity in position and use a level to ensure it’s perfectly straight. Use shims if needed to adjust the height and level. Mark the wall where you’ll need to drill holes for securing the vanity.
Securing the Vanity to the Wall
Using a stud finder, locate the wall studs. Drill pilot holes through the vanity’s back rail and into the studs. Secure the vanity to the wall using screws appropriate for your wall type.

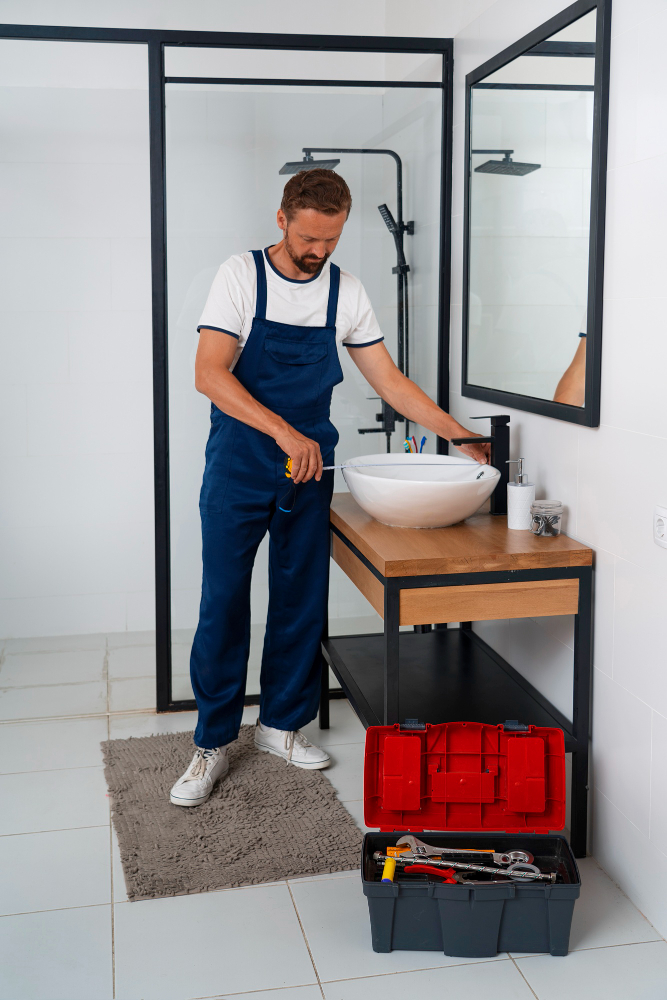
Installing the Sink and Faucet
With the vanity in place, it’s time to install the sink and faucet. This step can vary depending on the type of sink you’ve chosen.
Attaching the Sink to the Vanity Top
If your sink isn’t already attached to the vanity top, you’ll need to do this first. Apply a bead of silicone caulk around the sink opening on the vanity top, then carefully place the sink into position. Secure it according to the manufacturer’s instructions.
Installing the Faucet
It’s usually easier to install the faucet before placing the vanity top. Follow the manufacturer’s instructions for your specific faucet model. Make sure to use plumber’s tape on all threaded connections to prevent leaks.
Securing the Vanity Top
Once the sink and faucet are in place, apply a bead of silicone caulk to the top edges of the vanity cabinet. Carefully lower the vanity top into place, making sure it’s centered and level.
Connecting the Plumbing
The final step in the installation process is connecting all the plumbing. This is where attention to detail is crucial to prevent leaks.
Connecting the Water Supply Lines
Attach the water supply lines to the faucet, making sure to use plumber’s tape on the connections. Tighten them securely, but be careful not to overtighten.
Installing the P-Trap
Connect the P-trap to the sink drain and to the wall drain pipe. Again, use plumber’s tape on the connections and tighten securely.
Checking for Leaks
Once everything is connected, turn the water supply back on and check all connections for leaks. Run the faucet and check under the sink for any drips or moisture.
Finishing Touches
With the plumbing connected and leak-free, you can focus on the final details to complete your vanity and sink installation.
Caulking Around the Vanity
Apply a thin bead of silicone caulk around the edges of the vanity where it meets the wall and floor. This will create a waterproof seal and give a finished look.
Installing Hardware
If your vanity came with separate hardware (like drawer pulls or knobs), now is the time to install them. Make sure they’re aligned properly for a professional look.
Final Cleaning and Organization
Clean up any dust or debris from the installation process. Organize your bathroom items in the new vanity, taking advantage of any new storage features.

Troubleshooting Common Issues
Even with careful installation, you might encounter some issues. Here are some common problems and how to address them.
Dealing with Leaks
If you notice any leaks after installation, first check that all connections are tight. If the leak persists, you may need to disassemble the connection and reapply plumber’s tape.
Addressing Uneven Surfaces
If your floor or wall is uneven, causing issues with the vanity installation, you may need to use additional shims or even consider floor leveling compounds for a more permanent solution.
Fixing Drawer Alignment
If the vanity drawers don’t align properly, check that the vanity is level. You may need to adjust the drawer slides or add shims to correct the alignment.
Maintaining Your New Vanity and Sink
To keep your new vanity and sink looking great and functioning properly, regular maintenance is key.
Daily Care
Wipe down the sink and vanity top daily to prevent water spots and soap scum buildup. Use a soft cloth and mild cleaner suitable for your vanity’s material.
Periodic Deep Cleaning
Every few months, give your vanity a deeper clean. Remove items from drawers and shelves, and clean all surfaces thoroughly. Check under the sink for any signs of leaks or moisture.
Preventing Water Damage
Be mindful of water splashes and spills, especially on wood vanities. Wipe up water promptly to prevent damage to the finish or warping of the wood.
When to Call a Professional
While many homeowners can successfully install a vanity and sink, there are times when it’s best to call in a professional.
Complex Plumbing Changes
If your new vanity requires moving plumbing lines or significant changes to the existing setup, it’s often best to hire a licensed plumber.
Structural Concerns
If you have concerns about the structural integrity of your floor or wall, or if you need to make changes to support a heavy vanity, consult with a professional contractor.
Time and Skill Constraints
If you’re not confident in your DIY skills or don’t have the time to dedicate to the project, hiring a professional can save you stress and ensure a high-quality installation.
Conclusion
Installing a new vanity and sink can be a rewarding DIY project that transforms your bathroom. By following this guide and taking your time with each step, you can achieve professional-looking results.
Remember to prioritize safety, double-check your measurements, and don’t hesitate to seek professional help if you encounter any challenges beyond your skill level. With patience and attention to detail, you’ll soon be enjoying your updated bathroom space.
| Vanity Type | Average Installation Time | Skill Level Required |
|---|---|---|
| Freestanding | 2-4 hours | Beginner to Intermediate |
| Wall-Mounted | 3-6 hours | Intermediate to Advanced |
| Corner | 3-5 hours | Intermediate |
| Double Sink | 4-8 hours | Intermediate to Advanced |
| Common Issues | Possible Causes | Solutions |
|---|---|---|
| Leaking Faucet | Loose connections, worn washers | Tighten connections, replace washers |
| Uneven Vanity | Uneven floor, improper leveling | Use shims, adjust legs if applicable |
| Drawer Misalignment | Uneven installation, loose hardware | Re-level vanity, tighten or adjust drawer slides |
| Sink Not Draining | Clogged P-trap, improper slope | Clean P-trap, adjust drain pipe slope |
- Essential tools for vanity and sink installation:
- Adjustable wrench
- Pipe wrench
- Silicone caulk and caulk gun
- Level
- Drill with various bits
- Screwdriver set
- Plumber’s tape
- Utility knife
- Safety glasses and work gloves